
Bank
Creation
1.
Navigate to Payables Manager àSetup àPayment àBanks
and Bank Branches. Click on Banks tab and then click on Create
button.
(Can
also use Cash Management Responsibility àSetup àBanks
àBanks navigation)

2.
Select the country, enter Bank name & number and other Bank details. Then click on “Save and Next” button.

3.
Click on “Create” button under Address tab and add the address details.

Enter
the address details and click on apply button

Then click on “Save and Next”
button.

4.
Click on “Create Contact” button.

Enter
the details and click on “Apply” button.

5.
Click on “Finish” button and the Bank is created.

Bank
Branch Creation
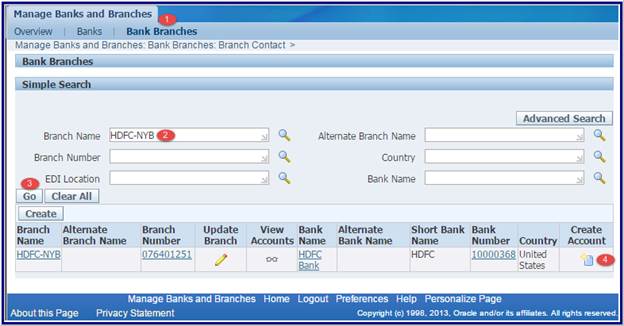
1.
Search the newly created bank from Payables Manager àSetup
àPayment àBanks and Bank Branches and then
click “Create Branch”.

2.
Click on continue button and enter the Branch name,Branch number and select
Branch type.Then click on “Save and Next” button.

Branch
Types are:
·
ABA: American Bankers Association
·
CHIPS: Clearing House Interbank
Payment System
·
SWIFT: Society for Worldwide
Interbank Financial Telecommunication
·
OTHERS
1. Please note: The Bank Branch Number is called the Routing
Transit Number for US Banks. This number has to conform to a "check digit
validation" as required for US Banks as part of Federal Financial
Requirement #PMC-18. The branch using ABA will have to have Routing Transit Number.
2. Entered "Routing Transit Number" (Branch Number) did not conform to the check digit algorithm. Hence Errors as:
The Check Digit Validation for Routing Transit Number has failed. Please enter as correct value for the Routing Transit Number.
(2). Details of the algorithm are given in the Cash Management User Guide, Appendix F - Country Specific Bank Account Validations: United States
Validation Rules:
The fields are checked for validity by adopting the following rules:
Routing number here is our bank branch number. The following validations are performed for all US bank branches. The first 8 digits of the bank branch number must not be 0 -- so the valid range is 00000001 to 99999999. Valid Check digit, which is the 9th digit of the bank branch number, should be 0-9. The bank branch number field is optional.
Validation
A new validation is required for the Bank Branch Number for US Banks as part of federal financial requirement # PMC-18. The field is a nine-digit numeric-only field. The validation requires prohibiting fewer or more than nine characters, allow for only numeric characters, and prohibit the entry of all zeroes in this field. The purpose of the edit is to ensure the validity of the routing transit number (RTN) and prevent erroneous returns or payments. The ninth digit of the Number field will be used to represent the Check Digit. The authenticity of the Check Digit will be validated as well. The Check Digit is computed using
Modulus 10 as follows:
1. Multiply each digit in the Routing Number by a weighting factor. The weighting factors for each digit are:
Position 1 2 3 4 5 6 7 8
Weights 3 7 1 3 7 1 3 7
2. Add the results of the eight multiplications.
3. Subtract the sum from the next highest multiple of 10. The result is the
Check
Digit.
Example:
Routing No.: 0 7 6 4 0 1 2 5
Multiply by: 3 7 1 3 7 1 3 7
Sum: 0 49 6 12 0 1 6 35 = 109
Check Digit = 1 (110 minus 109)
In this example, the routing transit number and check digit 076401251 will pass validation if this is the value entered into the Bank Branch Number field. If the Bank Branch Number passes validation, then the record is saved, otherwise an error message is returned.

3.
Click on “Create” button under Address tab and add branch address details.


Then click on “Save and Next”
button.

4.
Click on “Create Contact” button. Enter the details and click on “Apply”
button.


5.
Click on “Finish” button and the Branch is created.

Bank
Account
1.
Search the newly created Branch under Bank Branches tab and then click on
“Create Account”.
2.
Click on continue button and enter the Bank Account Owner.Also select the “Account Use” . Then click on
Next button.


3.
Enter the account Name and other account information’s. Then click on “Save and
Next” button.

4.
Enter the Account Control informations and click on “Save and Next”
button.
·
Multiple
Currency Payments: Enable
this option if you want to use this bank account to pay invoices entered in
multiple currencies. You can select this option only if the Use Multiple
Currencies Payables option is enabled and of the bank account is in your
functional currency.
·
Allow
Zero Payments: Enable
this option to allow zero-amount payments from this bank account.
·
Pooled
Account: Enable
this option if you use Automatic Offsets and you want to associate multiple
companies with this bank account. Oracle Payables creates one corresponding
cash accounting entry for each liability distribution. Oracle Payables builds
the cash account based on the cash account defined for the bank account, and on
the account segments of the liability lines.
·
Maximum
Outlay: Enter
the largest currency outlay that you allow for a payment batch for this bank
account. The system displays a warning if the payment batch exceeds this
amount. However, you can continue to process the payment batch. You can
override this default amount when initiating a payment batch.
·
Minimum
Payment: Enter
the lowest payment amount that you allow in a payment batch. You can override
this default amount when initiating a payment batch. Maximum Payment. Enter the
largest payment amount that you allow in a payment batch. You can override this
default amount when initiating a payment batch.

5.
Click on “Add Organization Access button” and enter the Organization and select
Account Use options.Then click on Continue button.


5.
Enter the Payables and GL options and click on “Save and Next” button.


6. Click
on “Create Contact” button if you want to create contact.

Then click on Finish button and the
Bank account will be created.

Payment
Document
1.
Select the Account and click on “Manage Payment Documents” button.

2.
Click on Create button and enter the Document Name.Then select
the Paper Stock Type and Payment Format.Alsoenter First
and Last(Last not mandatory) Document number.
Select Paper
Stock Type as Blank Stock for Electronic Payment
format and Prenumbered Stock for Paper payment
format.


3.
Then click apply and the Payment Document will be created.


2 comments:
Hi Raju,
Please confirm if we need to attach the payment document for ACH what should be the Format and first available and last available document number should be what?
Regards,
Aanchal
Hi Aanchal,
It is not mandatory to create a payment document for ACH for checks it is mandatory and client will provide the document numbers.
Thanks,
Raju
Post a Comment