
It comes up frequently that clients would like to view information about SSHR transactions that are In-Progress (and Completed, but we're going to start small). While some information can be found using the Workflow responsibilities, more comprehensive forms canbe built using OA Framework so HR can monitor the pending transactions.
As with other how-tos on this site, refer to Note: 416708.1 or 787209.1 (newer) on Metalink titled "How to find the correct version of JDeveloper to use with eBusiness Suite 11i or Release 12" to find the right version. You might find after working with this product that none of them are right for you. I often feel this way.
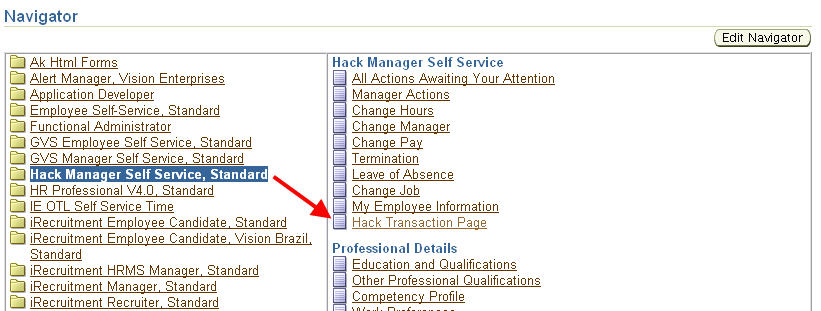
To keep my hacking from disturbing other areas of the application, I have created my own responsibility, menu and functions for this exercise. Here is the current list of funtions; we will add a new function which will be our custom page at the bottom of this list:

Once you have the product downloaded and unzipped, open it up. Right-click on the Workspaces node and select "New OA Workspace..."

Enter an arbitrary name for your Workspace. In keeping with convention, mine will be called "hack.jws". Leave the default directory alone. This is where JDev will put the uncompiled java files you will be creating via this tool.

Enter a new file name for the project file. Use the same name as your workspace here. Enter a default package by beginning with an arbitrary identifier (in my case, 'hack') followed by oracle.apps and then any additional levels you'd like to add that make sense. Since this is related to SSHR, I will use 'per'. The 'webui' on the end specifies the package where user-interface objects like the page and controller .class (code that controls events and button-clicks, etc.) will be created.

Click Next...

When you get to the Runtime Connection, it's time for a detour. You will need to specify a .dbc (Database Connection) file. This is stored on the middle tier at $FND_TOP/secure (for 11.5.10). It must be copied to C:\JDEVOAF\jdevbin\jdev\multi\system\oa\dbc_files\secure on your local machine, where "JDEVOAF" is the directory where you installed JDeveloper.

Another option is to generate the file locally by following these steps. Go to the application URL home page and append this to the URL:
/OA_HTML/jsp/fnd/aoljtest.jsp
Enter the appropriate details:

Scroll to the bottom and click the link:

Choose the "Locate DBC File" link:


Copy this file and save it as hack.dbc to C:\JDEVOAF\jdevbin\jdev\multi\system\oa\dbc_files\secure on your local machine where C:\JDEVOAF is the directory where you installed JDeveloper.
You can now proceed with Step 3 by selecting the .dbc file and entering an Oracle Apps username/password combination here, leaving the responsibility/code the same:

Big finish:

Now that your Workspace/Project is created, right-click and choose "New Business Components Package..."

Skip the Welcome screen and leave the defaults shown here:

On the next screen, we will need to specify a connection. Since none yet exists, click New...

Skip the welcome page again and specify an arbitrary name for the Connection Name and leave the Connection Type as "Oracle (JDBC)":

Enter the username/password, click Next...

Enter the connection details for your instance:

Success!

Continue on through the wizard, clicking next on Step 3 of 3 and then Finish:


Now that you have a new OA workspace, project and default package, you can begin creating your custom page:

Right-click the project and choose New:

When the page appears, select Web Tier -> OA Components -> Page:

The title is arbitrary, but we'll name is something meaingful like TransactionsPG:

Once the page is created, start by renaming the first region to 'pageLayoutRN'. This is just a good practice to have all regions ending in "RN". Pages are "PG", View Objects "VO", etc:

Once you are done, right-click the pageLayout region and choose "Set New Controller". This will create a template file that will handle events/mouse-clicks on the page:

JDev will ask you where you'd like to put this code. Choose the "webui" package and be sure that the keyword "webui" is not repeated at the end. I will keep the naming convention the same as the page and call it TransactionsCO. It should look like this:

We want to display information about our transactions that are in-progress. We'll further stipulate that we only want to see those transactions created by the manager using this function. Let's start with some SQL. Here is a SQL statement to find some basic information about the transactions created by a particular person id. If you'd like to get fancy and add additional joins to bring in the approvals, etc, go for it:
select hat.transaction_id
,hat.transaction_effective_date
,fffv.user_function_name
,papf_sup.full_name creator_person
,papf_emp.full_name selected_person
,hat.item_type
,hat.item_key
,hat.process_name
,hr_general.decode_lookup('PQH_SS_TRANSACTION_STATUS',hat.status) status
,hat.last_update_date
from hr_api_transactions hat
,per_all_people_f papf_sup
,per_all_people_f papf_emp
,fnd_form_functions_vl fffv
where 1 = 1
and hat.creator_person_id = papf_sup.person_id
and hat.transaction_effective_date between papf_sup.effective_start_date and papf_sup.effective_end_date
and hat.selected_person_id = papf_emp.person_id
and hat.transaction_effective_date between papf_emp.effective_start_date and papf_emp.effective_end_date
and hat.function_id = fffv.function_id
and hat.creator_person_id = :1
order by hat.transaction_id desc
Let's create a region on the page to display this data. Right-click the pageLayoutRN -> New -> Region

Immediately you'll see your new region under the pageLayoutRN. Set the properties as shown below. These properties just set the region type = table and give it a nice heading of "In-Progress Transactions" that will be displayed on the page:

We now have a region that can display our data, but we must create a View Object inside our project to retrieve this data. Right-click the project and choose New Business Components Package:

JDev will prompt you to name the package. Since we're working with data, this package should be named with "server" on the end. Mine will be called: hack.oracle.apps.per.server. Click "Next" after entering:

Leave the defaults and click Next on step 2:

Click Finish:

Now that you have a new package to store your data objects, right-click it and choose New View Object:

Lettuce call the new View Object TransactionsVO and place it in the package shown by default:

Next:

Next:

Next:

Copy/paste the SQL statement along with the bind variable :1 into window of Step 5 and test it for correctness before clicking Next:

Leave the defaults and click Next:

Click Next for the last time on this Wizard and then Finish:

So far, you have a Page with a table region and a View Object to retrieve the data. The table region can display the VO but for this to happen, we must perform the following:
- Create an Application Module
- Associate the View Object with the Application Module
- Congifure the page to point at the proper Application Module and View Object
- Write rudimentary code to bind the variable to our View Object at run time
First, right click the "server" Business Components Package and choose "New Application Module":

Click Next at the introduction screen. I skipped that screen since we're at 44 screen prints and counting. Use a catchy name like "TransactionsAM" for the title and leave the default for the package value:

On Step 2, highlight the VO on the right and click the shuttle button in the center, thereby tying the VO to the Application Module. Click Next when finished:

Click Next on Step 3 of 4:

Click Finish on Step 4 of 4 to create the AM .java file:

Find your page in the Navigator pane in JDev and then choose the pageLayoutRN. This is where you will want to set the Application Module. Click the elipsis and choose the only available AM:

Once this step is complete, right-click on the table that is nested beneath the pageLayout region and create a new Item:

Here you will give the item a unique name (I use "txt" in front of all display objects), an Item Style of "messageStyledText" and choose the View Object and View Attribute:

A close-up of the View Attribute property:

Here is a summary of all properties. I added the Prompt and Sort Allowed properties:

You must repeat for each field from the View Object you wish to see on the page/pagina. I added 7 additional fields:

We now must bind the variable in the View Object so that we pick up only specific records instead of all In-Progress transactions. To do this, the following must happen:
- Create a method in the VO to bind the variable
- Create a method in the Application Module to pass the parameter to the VO
- Create a method-call in the Controller .class to initiate the whole sequence
Let's start by double-clicking the View Object Implementation file (VOImpl) and adding some code:

The import command allows you to write messages in the output of the VOImpl as it executes. The method call is pretty straightforward. Set the WHERE clause to null, bind the parameter and execute the query. The JDev table bean will handle presenting the data according to how you chose to decorate your table by using messageStyledText or messageTextInput fields, etc.
package hack.oracle.apps.per.server;
import oracle.apps.fnd.framework.server.OAViewObjectImpl;
import oracle.apps.fnd.common.AppsLog;
// ---------------------------------------------------------------
// --- File generated by Oracle Business Components for Java.
// ---------------------------------------------------------------
public class TransactionsVOImpl extends OAViewObjectImpl
{
/**
*
* This is the default constructor (do not remove)
*/
public void bindVals(String strPersonId)
{
AppsLog myAppsLog = new AppsLog();
if(myAppsLog.isEnabled(3))
{
myAppsLog.write("fnd.common.WebAppsContext", "HACK - hack.oracle.apps.per.server", 3);
}
setWhereClauseParams(null);
setWhereClauseParam(0, strPersonId);
executeQuery();
}
public TransactionsVOImpl()
{
}
}
Double-click the TransactionsAMImpl.java file next and add a call to pass the variable to the VO:

The import statement at the top was added again for output messages. Additionally, add the initQuery method. Inside, you can see it just sends the strPersonId variable to the VO's bindVals method:
package hack.oracle.apps.per.server;
import oracle.apps.fnd.framework.server.OAApplicationModuleImpl;
import oracle.apps.fnd.common.AppsLog;
// ---------------------------------------------------------------
// --- File generated by Oracle Business Components for Java.
// ---------------------------------------------------------------
public class TransactionsAMImpl extends OAApplicationModuleImpl
{
/**
*
* This is the default constructor (do not remove)
*/
public TransactionsAMImpl()
{
}
/**
*
* Container's getter for TransactionsVO1
*/
public TransactionsVOImpl getTransactionsVO1()
{
return (TransactionsVOImpl)findViewObject("TransactionsVO1");
}
public void initQuery (String strPersonId)
{
AppsLog myAppsLog = new AppsLog();
if(myAppsLog.isEnabled(3))
{
myAppsLog.write("fnd.common.WebAppsContext", "HACK - initQuery 1", 3);
}
getTransactionsVO1().bindVals(strPersonId);
//
if(myAppsLog.isEnabled(3))
{
myAppsLog.write("fnd.common.WebAppsContext", "HACK - initQuery 2", 3);
}
}
/**
*
* Sample main for debugging Business Components code using the tester.
*/
public static void main(String[] args)
{
launchTester("hack.oracle.apps.per.server", "TransactionsAMLocal");
}
}
It's time to initiate the whole sequence when the page actually loads by making a method call in the Controller .class file. Double click the TransactionsCO.java file and begin editing as shown below. At this point, we are only editing the processRequest method which is called when the page loads. When you are confident with this exercise you can edit the processFormRequest and add event handling for button clicks and so forth.

The pageContext.getEmployeeId() is a built-in that will provide the person_id of the current user, in this case the manager/creator of the transaction. It is then cast as a string. The Application Module for this part of the page is found and then an array is created and populated with the person_id. Finally, the invokeMethod call kicks off the process of binding the variable and running the query.
Once you have reached this point, do a "Make" and then a "Rebuild" and then Save your works.

Now that development is complete, how do we deploy this to Oracle Applications? Let's first create a custom function in the app:
(N) Functional Administrator -> Core Services -> Functions -> Create Function
Configure and click Continue:

Configure and click Submit:

The function is ready, but it's not attached to the Hack Manager Self Service menu, nor is it available for use. We must add it to the following menus:
- HACK Manager Self Service (or your custom Manager Self Service menu)
- Global Self Service Functions Custom
- Manager Actions Menu

Clear the cache so that the function appears on the menu:

Currently we have a function that points at custom code but we have not yet deployed it to the application and database. The following must occur to complete this exercise:
- Deploy JDev code to the application tier under $JAVA_TOP
- Import the custom page into the database
- Bounce apache
Start by browsing to C:\JDEVOAF\jdevhome\jdev\myclasses where "C:\JDEVOAF\" is the directory where you installed JDeveloper. Find the folder called "hack" and .zip it. This will contain all the compiled .class files and .xml files from when you performed a "Make" and "Rebuild".
Do the following:
- FTP the .zip file to the middle tier
- Move it to $JAVA_TOP
- Unzip the file

Next, execute the following from a command prompt. This will import the custom page into the Java Document Repository (set of tables prefixed with "JDR"):
C:\JDEVOAF\jdevbin\jdev\bin\import C:\JDEVOAF\jdevhome\jdev\myprojects\hack\oracle\apps\per\webui\TransactionsPG.xml -rootdir C:\JDEVOAF\jdevhome\jdev\myprojects\ -userId 1 -username apps -password hack -dbconnection "(DESCRIPTION=(ADDRESS_LIST=(ADDRESS=(PROTOCOL=tcp)(HOST=oracle.hack.local)(PORT=1521)))(CONNECT_DATA=(SERVICE_NAME=hack)))"
The page is now imported:

Once all the files are in place, bounce apache and test your new creation:

Now that you know the basics, the sky's the limit. Add a details image to drill-down to the transaction specifics. Add a pop-up to display the approvals chain

1 comment:
thank u..nice one
Post a Comment