
Controlling
Supplier Information Entry
The Supplier
pages provide you with complete access to all of the supplier attributes,
allowing you to do things, such as create new suppliers, update location
information for the supplier, and add new payment bank account information.
Function
security can be used to enable or disable user access to each of the Supplier
pages to allow you to control which elements of the supplier attributes can be
accessed or updated by each user. This allows you to segregate the duties that
users can perform by setting up a range of responsibilities that provide access
to different sets of the Supplier pages which assist you in conforming to
separation of duties requirements. For example, by default, you could prevent
most users from accessing the banking details for suppliers, and grant a
limited set of users a responsibility that includes access to a supplier's
banking information.
You can
either grant full update access to your users or grant them read-only access to
the Supplier pages. You can also grant access to users to view all supplier
records or only to view Standard Suppliers. This allows you to restrict the
users that can access employee-supplier records that contain sensitive personal
information for the employee that is used to pay their expenses. The
current functionality does not provide any way to restrict access to employee
suppliers only. If a user is granted employee supplier access then they
will also have access to standard suppliers and an enhancement request was logged for
this. Please see Note:1368011.1 for more information.
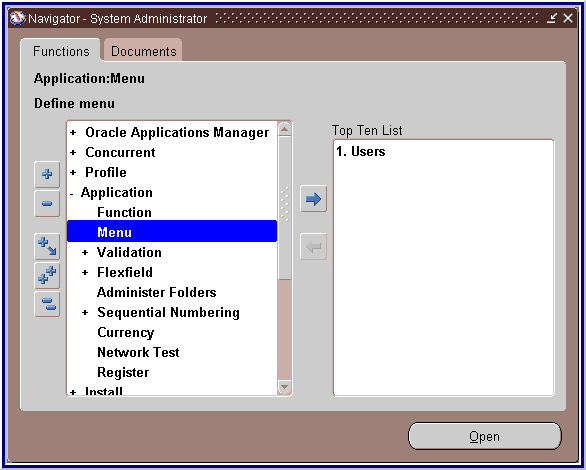
R12 Supplier entry and inquiry navigation paths still exist but they are the same webform and therefore the ability to create suppliers exists by default in the inquiry page. To prevent users from creating suppliers it is necessary to exclude the function Supplier Full Access: Buyer View (POS_HT_SP_ACCESS_FULL) from a responsibility and assign that responsibility to users you wish to prevent from having this ability.
1.
System
Administrator àSecurity àResponsibility àDefine

2.
Query
the Payables responsibility you want to only have Inquiry access.
3.
Under
Menu Exclusion area, set the following:
Type = Function
Name = Supplier Full Access : Buyer View
Type = Function
Name = Supplier Full Access : Buyer View

4.
Save
and test this responsibility.
However,
there is an issue with Payables Inquiry
responsibilities allowing users to update supplier data even after excluding
function Supplier Full Access: Buyer View. In order to prevent this
several patches are required. See Note:1089925.1 for patch
details.
There is also a personalisation that is needed to
prevent the Supplier Bank Accounts from being updated via the Inquiry
responsibility and that is detailed in Note:1328525.1.
The
employee specific functions which are currently available for supplier
restrictions are as follows:
POS_HT_SP_EMP_SUPPLIER - Create/Update employee supplier details
POS_HT_SP_RO_EMP_SUPPLIER - View employee supplier details
POS_HT_SP_EMP_SUPPLIER - Create/Update employee supplier details
POS_HT_SP_RO_EMP_SUPPLIER - View employee supplier details
Responsibilities
that need the ability to create employee suppliers need to have
POS_HT_SP_EMP_SUPPLIER added to the menu, however if responsibility is an
inquiry only responsibility then the function POS_HT_SP_RO_EMP_SUPPLIER needs
to be added to allow inquiry of employee suppliers. See Note: 1368011.1
and 955482.1.
Query with AP_NAVIGATE_GUI12 menu name and
enter the below values
In addition to the function POS_HT_SP_ACCESS_FULL, if you
also have access to POS_HT_SP_EMP_SUPPLIER, then you can also create, update,
or query employee type suppliers. The creation and update of employee suppliers
are disabled by default.
The
following shows a summary of the various functions that can be included and
excluded to achieve the desired result.
|
Mode
|
Objective
|
Exclude Function (At Responsibility
Level)
|
Include Function (At Menu Level)
|
|
Inquiry
|
Prevent
Supplier Creation
|
Supplier
Full Access: Buyer View (POS_HT_SP_ACCESS_FULL)
|
|
|
Inquiry
|
Query
Employee Suppliers
|
Supplier
Full Access: Buyer View (POS_HT_SP_ACCESS_FULL)
|
View
Employee Supplier Details (POS_HT_SP_RO_EMP_SUPPLIER)
|
|
Entry
|
Create/Update
Suppliers
|
|
Supplier
Full Access: Buyer View (POS_HT_SP_ACCESS_FULL)
|
|
Entry
|
Create/Update
Employee Suppliers
|
|
Supplier
Full Access: Buyer View (POS_HT_SP_ACCESS_FULL)
Create/Update
employee supplier details (POS_HT_SP_EMP_SUPPLIER)
|

Entering Employees as Suppliers
You must enter an employee as a supplier before you
can pay the employee's expense reports. Payables can do this in two ways
automatically during Expense Report Export, or entered manually in the Create
Suppliers page.
To set up
Payables for integration with employee information:
a)
In the Financials Options window, set the options in
the Human Resources region. These provide defaults during employee record
entry.
Nav
: Payables, Vision operations (USA) àSetup àOptions àFinancials
Options

b)
In the Payables System Setup window, in the Supplier
Number Entry field, choose Automatic. If you don't choose this option, then
Payables can't automatically create suppliers for you during Expense Report
Export.
Nav
: Payables, Vision operations (USA) àSetup àOptions àPayables
System Setup


c)
In the Payables Options window, set the options in the
Expense Report region. Enable the Automatically Create Employee as Supplier
option so Payables will automatically create a supplier record the first time
you import an expense report for each employee.
To have
Payables automatically create supplier information for employees during Expense
Report Export, enable the Automatically Create Employee as Supplier Payables
option in the Expense Report region of the Payables Options window.
If this
option is enabled, then when you import employee expense reports, Payables uses
information from the employee record to create supplier and supplier address
information for the employees. For example, if you import an expense report
with HOME as the payment address and if the employee is not entered as a
supplier, then Payables automatically enters a supplier record for the employee
with a payment supplier address called HOME. The system creates a site that
uses the HOME address in the Human Resource default operating unit for the
employee. The Supplier Type will be Employee, and the Employee Name and Number
fields are automatically populated.
Nav : Payables, Vision operations (USA) àSetup àOptions àPayables Options


d)
Enter employee records. Either your Human Resources
department enters employee information in the People window (if HRMS is
installed), or the appropriate department enters employee information in the
Enter Person window. To ensure that Payables can create a supplier record
during Expense Report Export, the following are requirements for each employee
record:
the employee
name is unique
reimbursement
address for either Home or Office exists
City/State/Country
does not exceed 25 characters
Zip Code for
the home address does not exceed 20 characters
e)
(Optional) In the Suppliers page, enter a supplier
record for the employee. You don't need to do this step if you complete steps 2
and 3, because the system creates supplier records automatically during Expense
Report Export.
f)
To link an existing supplier with an employee, in the
Suppliers: Organization page, choose Employee as the Type, then enter either
the employee name in the Supplier Name field or the employee number in the
Supplier Number field. (Payables creates this link automatically for any
employee supplier records it creates during Expense Report Export.)
g)
Ensure employee
supplier access has been granted (See ‘Controlling Supplier Information Entry’
above)
Following are the key Internet Expense Setups
1.
Employee Creation
2.
Responsibilities Assignment
3.
User Creation
4.
Securing Attributes
5.
Signing Limits
6.
Expense Template
1. Employee Creation:
To submit
expense report, employee must be created in HRMS. In this paper we are creating
employee as ‘Raju Chinthapatla’ and employee’s manager as ‘Venki Manager’. To
approve Employee’s Expense Report, employee’s manager should be entered in
supervisor tab in employee’s assignment window. Here we are creating employee’s
manager (Venki Manager) first, so that we can add supervisor for an employee.
Default Expense Account should be entered in Purchase Order Information tab
when create employee, so that this account will be charged when the employee
submit an Expense Report.
Employee’s Manager: Venki Manager
Navigation:
HRMS Manager: People --> Enter and Maintain àNew

Enter the
details and click on Assignments button

In Purchase
Order Information tab enter the Default Expense account

Employee: Raju Chinthapatla
Navigation:
HRMS Manager: People --> Enter and Maintain àNew

Enter the
details and click on Assignments button

In Supervisor
tab enter the manager name and save

2. Users Creation:
Employee can
submit the expense report using User Login credential. User should be created
in System Administrator and Employee must be attached with the Person. Also
responsibilities should be added to the users. Here we are going to create
Employee’s user (RAJU.C1204) and Manager’s user (VENKI.J0425)
with responsibilities added.
Employee’s User: RAJU.C1204
Navigation:
System Administrator: Security àUser àDefine

Manager’s User: VENKI.J0425

3.
Responsibilities Assignment:
A
responsibility is a level of authority in Oracle Applications that lets users
access only those Oracle Applications functions and data appropriate to their
roles in an organization
Main responsibilities used in iExpense process are
Internet
Expenses : Used to create an expense report
System
Administrator
: Used to create users and assign responsibilities to the users
Payables
Super User : Used to define expense report templates and check expense
report type Invoices
HRMS
Manager : Used to define
employee and assign supervisor for an employee
Additional Responsibilities are
Internet
Expenses
Auditor
: Used to audit expense report
Internet
Expenses Audit Manager : Used to create new auditors
Internet
Expenses Setup and Administration : Used to manage the setup of Internet
Expenses
Expense
Analysis and Reporting : Helps managers to review
policy violations and spending patterns Internet Expenses Help
Desk
: Used to help desk personnel who are responsible for helping end users
Responsibility
can be assigned to User at System Administrator: Security àUser àDefine

4. Securing Attributes:
The securing
attributes ICX_HR_PERSON_ID and TO_PERSON_ID must be assigned to every user of
Internet Expenses and the responsibilities which use to submit expense reports.
Securing attributes determine user may enter expense reports for. At a minimum,
users must have a securing attributes defined for themselves, which either
system administrators or employees can make. Employees can also assign securing
attributes in the Expenses Preferences page.
Ideally
these Securing Attributes get added the moment the employee added to the User.
Note: You must re-Query after
saving Person to see the updated Securing Attribute
The seeded
responsibilities in Internet Expenses by default contain the securing attribute
ICX_HR_PERSON_ID : which confines user access to the user ID value
assigned to the securing attribute. If you use custom responsibilities to
submit the expense report, you must assign the attribute ICX_HR_PERSON_ID
: for that. The securing attribute can assign authorized delegates to a user.
Authorized
delegates are users who can enter expense reports for another user. For
example, managers and other executives may want to give their assistants the
ability to enter expense reports for them.
Responsibility:
Internet Expenses
Navigation:
System Administrator àSecurity àResponsibility
àDefine
This
responsibility is Secured by Securing Attribute: ICX_HR_PERSON_ID

Employee’s User: RAJU.C1204
Navigation:
System Administrator: Security àUser àDefine

Manager’s User: VENKI.J0425
Navigation:
System Administrator: Security àUser àDefine

5. Signing Limits:
Managers can
approve an expense report only if the total amount of the report does not
exceed their signing limit. ‘Manager (Spending) Approval Process’ in the
Expense Reporting workflow uses the signing limits which you define to
determine whether managers have an authority to approve expense reports.
When you
assign signing limits to a manager, you specify a cost center to which the
signing limit applies. You can also give managers signing limits for multiple
cost centers.
Note:
Signing limits are required only for Non-AME approval process, not required for
AME approval Process
Navigation:
Payables Super User àEmployees àSigning Limits

6. Expense Template:
Use the
Expense Report Templates window to define expense report templates for Internet
Expenses. A template contains a list of expense items, and the default information
for each item, that self service users can enter on their expense reports. You
must define at least one expense report template with the ‘Enable for Internet
Expenses' Users check box selected. Only expense report templates with this
option enabled can be used in Internet Expenses. Use the Oracle Payables
Expense Report Templates window to define your expense report templates.
Template Name/Description: Name and description of the template.
Inactive Date: Date after which
you can no longer use this template to enter expense reports.
Expense Item: The name of an
expense item as it appears on an expense report, for example, Airfare or Meal.
You can set up a miscellaneous expense item with no account so you can enter
the account during expense report entry. If you do not assign a Prompt then the
value you enter here will appear in the Expense Type poplist.
Expense Category: Expense Item
Categories. For example: Accommodations, Airfare, Car Rental, Meals, Mileage,
Miscellaneous and Per Diem.
Tax Code: Tax Code can be
attached for Expense Items.
GL Account: We can enter GL
Account against each Expense Item, GL Account will be charged based on Expense
Item which used while enter Expense Report.
Policy Schedule: Policy Schedules
can be attached to Expense Item. Policy schedules contain the rules, rates, and
allowable tolerances to use for a given expense category and time period.
Policy schedules should be defined in Expenses Setup and attached to Expense
Template. Refer the Implementation Guide for more details.
Navigation: Payables Super
User àSetup àInvoice àExpense Report Template

Employees
can create expense reports in these ways:
• Online - using their computers and a
standard Web browser.
• Online - using Web-enabled mobile
devices.
• Offline - using Microsoft Excel
spreadsheets from a configured template.
With
Oracle Internet Expenses, employees can enter and submit expense reports using
a standard Web browser or a Web-enabled mobile device. Oracle Workflow
automatically routes expense reports for approval and enforces reimbursement
policies. Oracle Internet Expenses integrates with Oracle Payables to provide
quick processing of expense reports for payment.
In
this paper we will provide an overview and instructions on expense report
setups, functional flow, few additional futures and technical overview.
Functional Overview

Sending Receipts to Accounts Payable
After
an employee submits an expense report, Internet Expenses displays a confirmation
page with instructions for the employee. For example, you may want to inform
the employee that a notification will be sent when the report is approved by
management and at that time all original receipts must be sent to the accounts
payable department. Most of the companies require original receipts for
verification before reimbursing employees for business expenses.
Expense Report
Workflow Process
When
an employee submits an expense report for approval, the Expense Report workflow
process begins. The Expense Report workflow is used to obtain manager and
Payables approvals on expense reports. The Workflow Approval process routes
expense reports to managers for approval. If a manager rejects the report, the
workflow transitions to the Rejection process. The AP Approval process first
determines whether an expense report requires the approval of the accounts
payable department. If approval from the accounts payable department is not
required, the process automatically approves the expense report. If the report
requires approval from the accounts payable department, the process waits until
it receives a response from that department before continuing.
Converting Expense
Reports into Invoices
Oracle
Payables pays invoices only, so before an approved expense report can be paid,
it must be converted into an invoice. The Oracle Expense Report Export program
converts expense reports created in Internet Expenses into invoices in Oracle
Payables. An expense report can be processed by the Expense Report Export
program only if it receives approval from both the approval manager and the
accounts payable department during the Expense Report workflow process.
1) Create Expense Report
Nav :
Internet Expenses -->Expense Home --> Click on Create Expense Report

2) Enter
the Expense type, Department and click on Next

3) Enter
Receipt amount and click on details button

4) Enter
the details and click on Return button

5) Verify
the details and click on Submit button


6) Login
with Manger user i.e. VENKI.J0425 and open the notification

7)
Click on Approve

8) Expense
report status will changed to Ready For Payment
Note : This report did not require AP
(audit) Approval as it was auto approved by AP (audit). Now this report has the
manager and payables approvals and it cannot be withdrawn

Expense Report Export
‘Expense
Report Export program’ to create Payables invoices from expense reports you
entered in Oracle Internet Expenses. You can then use Payables to validate and
pay these invoices and create accounting entries for them.
When you
export expense reports from Internet Expenses, Payables records the source of
the invoices and invoice details. Expense Report Export verifies all your
expense report information to ensure it creates valid, fully-distributed
invoices that are ready for validation. Oracle Internet Expenses does not
export expense report information to Oracle payables more than once.
If the
expense report information fails validation, then Expense Report Export program
does not export the expense report, and Payables does not create an invoice
from the information. You can view rejected expense reports on the Export
Results page.
Note: Some
users may plan to run the Expense Report Export concurrent program from the
Payables Concurrent Request Form. To review the results of the export from this
form, as opposed to the web audit page, we can add the function, Function Name:
OIE_EXPORT_RESULTS_FN (User Function Name: Expenses: Export Results) to the
Payables menu.
Note :
Expense Report Export program can also be run from Oracle Payables. However
results of invoices exported and rejections can be reviewed only in Internet
expenses auditor responsibility.
Expense
Report Export Parameters are
Batch
Name: Payables
groups the invoices created from the expense reports you export from Oracle
Internet Expenses and creates an invoice batch with the batch name you enter.
Source: Enter the name of the source of the
expense reports. Payables automatically create invoices from the source you
enter.
• Payables
Expense Reports - Expense reports entered in Oracle Payables.
• Oracle
Internet Expenses - (the default) Expense reports entered in Oracle Internet
Expenses. Also used to export credit card provider invoices for the Both Pay
process.
Transfer
Descriptive Flexfield:
Enter ‘Yes’ if you want to export Descriptive Flexfield details for the source
you select. If you enter Yes, Payables transfers any Descriptive Flexfield
information you have defined for the expense report you are exporting, and
creates invoices and invoice distributions with the same Descriptive Flexfield details.
GL Date: The date you enter must be in an
Open or Future Enterable period. Else Payables will not create invoice from
expense reports.
Group: To limit the export to expense
reports with a particular Group ID, enter the Group ID. The Group must exactly
match the GROUP_ID in the Payables Open Interface tables.
Debug
Switch: Select
‘Yes’ to have Expense Report Export provide you with more detailed
troubleshooting information.
Organization
Name: To limit the
export to expense reports for a particular organization, enter the
organization.
Send
Notifications To:
Select a person to receive notifications in case of rejections or review.
Navigation: Internet Expenses Auditor àExpenses
Export Tab àExport Run Sub-tab
Enter the
parameter values and click on Continue button

Click on
Submit button

Auditor
gets confirmation message that Expense Report Export has been submitted:

Auditor
reviews the Expense Reports which have been created as Invoices by Expense
Report Export Program
Navigation:
Expenses Export àExport Results àInvoices
àRequest ID: 8032831 àGo


Check the
Log which created by the Expense Report Export Program
Navigation:
Expenses Export àExport Requests àRequest
ID: 8032831 àDetails

Click on
View Log button

Expense
Report Export Program inserts the data into Payables Interface tables and it
will trigger ‘Paybles Open Interface Import’ Program to import the data
to Oracle Payables.
Log file
shows how many Expense Reports are fetched and how many Invoices are created by
Expense Report Export program
+---------------------------------------------------------------------------+
Payables: Version :
12.2
Copyright (c) 1998,
2013, Oracle and/or its affiliates. All rights reserved.
APXEXPER: Expense
Report Export
+---------------------------------------------------------------------------+
Current system time
is 04-DEC-2015 08:14:27
+---------------------------------------------------------------------------+
**Starts**04-DEC-2015
08:14:27
**Ends**04-DEC-2015
08:14:34
+---------------------------------------------------------------------------+
Start of log messages
from FND_FILE
+---------------------------------------------------------------------------+
Begin Receipts
Management - Holds
Process Hold Each
Scenario
Determine whether to
place Holds
Process Hold All
Scenario
Determine whether to
place Holds
Process Hold BothPay
Scenario
Determine whether to
place Holds
Process Obsolete
Holds
Obsolete Holds
Obsolete Both Pay
Holds
Begin Processing
Individual expense reports
Fetching expense
report...
Expense Report
Number : **W71120**
Transfer Attachments
option(Y/N):Y
Validate Amounts
Employee Id 34205 is
not found
Fetching expense
report...
Credit Card Expenses
Fetched = 0
Credit Card Invoices
Created = 0
Call Payables Open
Interface
Expenses Fetched =
1
Invoices Created =
1
+---------------------------------------------------------------------------+
End of log messages
from FND_FILE
+---------------------------------------------------------------------------+
+---------------------------------------------------------------------------+
No completion options
were requested.
Output file size:
2281
+---------------------------------------------------------------------------+
Concurrent request
completed successfully
Current system time
is 04-DEC-2015 08:14:34
+---------------------------------------------------------------------------+
AP Invoice Creation:
Exported ‘Expense
Report’ type Invoice can be viewed in Payables Invoice Workbench Window.
Navigation: Payables Super User àInvoices àEntry
àInvoices, Query W71120


Click
on Distributions

Note : This
account is derived from Expense Report Template which is attached to Expense
Type ‘Airfare’

Expense Account Updates
When a user
enters an expense report, Internet Expenses defaults the user's cost center and
account for the expense report, based on the human resources setup of the
accounting flex field. If enabled, users can change the cost center at the
header level for the expense report. For line-level expense allocations, users
can make changes to account segments according to the expense allocations
setup, including expense lines where the expense type is assigned a particular
account on the expense report template.
Behavior of
Project account Builder and Accounting Client Extensions are out of scope
This
example illustrates the update hierarchy described above. Behavior
Assume this
setup for expense reports:
•
Accounting flex field: Company.CostCenter.NaturalAccount.Product
•
Default expense account: 01.100.6100.0000. This is the HRMS setup for the
employee.
•
GL account assigned to expense item type Telephone: 01.100.6200.7000
•
GL account assigned to expense item type Meals: 01.520.6300.0000
The
following updates are applied to the expense account and expense lines:
Update: Human resources setup changes the
expense account Natural Account segment to 6000.
Result: The default expense account
becomes 01.100.6000.0000.
Update: User changes the default cost
center for the expense report to 110.
Result: The expense account for this
expense report becomes 01.110.6100.0000.
Update: User enters the expense type
Telephone on an expense line.
Result: The expense account for the
telephone expense line becomes 01.100.6200.7000.
Update: User updates the Product segment
expense allocation for the telephone expense to 1000.
Result: The expense account for the
telephone expense line becomes 01.100.6200.1000.
Update: User enters the expense type Meals
on an expense line for an expense that was incurred while working on an
assignment for two different cost centers.
Result: The default expense account
becomes 01.520.6300.0000.
Update: User splits the meal expense of
$50 USD equally between cost centers 520 and 678.
Result: Two distribution lines are
created:
Distribution
1: 01.520.6300.0000 for $25 USD
Distribution
2: 01.678.6300.0000 for $25 USD


2 comments:
very good
Very well drafted
Post a Comment