
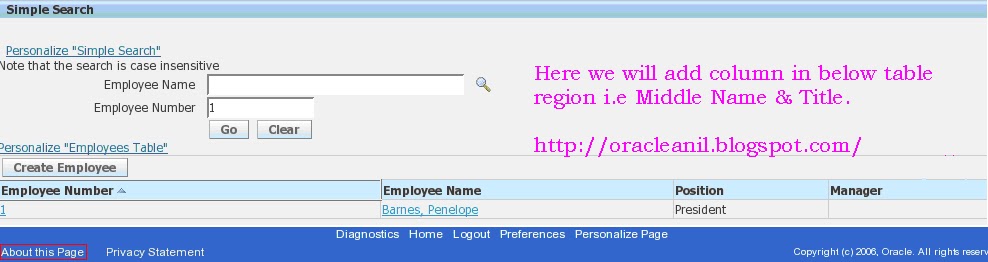
Our business requirement is to add employee Title and MiddleNamecolumn in the results table region
Analyzing the Page
click on “About this Page” link to check that which ViewObject is associated with the table region [ResultsRN]

Here we can see that results table has QueryVO attached to it. Now click on Business Component Reference details and check the path of QueryVO

So now click on QueryVO which is an EO based [FwkTbxEmployeesEO] to check whether it has those attribute or not those we want to add

Here we can see that our VO does not have Title & MiddleName attribute.
So for adding these attribute we need to perform VO Extension.
Now FTP the complete solution package (i.e. oracle.apps.ak.solution) from Application server into myclasses\oracle\apps\ak folder as well as in myprojects\oracle\apps\ak folder.
Open Jdeveloper and create a new OA workspace and project. Name workspace as Extend.jws and project as Extend.jpr.
Now right click on Extend project to open project properties Project ContentAdd to include the standard VO package in current project.

After adding BC4J package i.e. oracle.apps.ak.solution project looks like

Creating New View Object (VO): -
Right click on your project and select New-->Adf business Components-->View Object

Give the package name as oracle.apps.ak.ajay.employee.server, VO name as ExtQueryVO and in the extends property select QueryVO

The next screen allows the addition or deletion of Entity Objects. No change is required here for this extension so simply select Next.
The next pane allows additional attributes to be added or attributes to be removed. In this case add both the MIDDLE_NAMES and TITLEattributes to the selected list
Please note the new attribute you would be adding will be coming as Transient

Click on Next --> Next
Modify your sql statement to add new created attributes
SELECT FwkTbxEmployeesEO.EMPLOYEE_ID,
       FwkTbxEmployeesEO.FULL_NAME AS EMPLOYEE_NAME,
       FwkTbxEmployeesEO.EMAIL_ADDRESS AS EMPLOYEE_EMAIL,
       FwkTbxEmployeesEO1.EMPLOYEE_ID AS MANAGER_ID,
       FwkTbxEmployeesEO1.FULL_NAME AS MANAGER_NAME,
       FwkTbxEmployeesEO1.EMAIL_ADDRESS AS MANAGER_EMAIL,
       FwkLookupCode.MEANING AS POSITION_DISPLAY,
FwkTbxEmployeesEO.Middle_Names,FwkTbxEmployeesEO.Title
FROM   FWK_TBX_EMPLOYEES FwkTbxEmployeesEO,
       FWK_TBX_EMPLOYEES FwkTbxEmployeesEO1,
       FWK_TBX_LOOKUP_CODES_VL FwkLookupCode
WHERE  FwkTbxEmployeesEO.MANAGER_ID = FwkTbxEmployeesEO1.EMPLOYEE_ID (+)
       AND FwkTbxEmployeesEO.POSITION_CODE = FwkLookupCode.LOOKUP_CODE
       AND FwkLookupCode.LOOKUP_TYPE = 'FWK_TBX_POSITIONS'
Click on nextNextGenerate RowImpl and click on finish
Now as our attributes were created as Transient so we need to correct our XML file generated as it is a known error with Jdeveloper 10G & earlier versions.
Open your ExtQueryVO.xml file in some notepad editor.
Scroll to bottom of that file
Update
With
Save the xml file.
And restart your jdeveloper and check that in attributes its not showing as transient.

Substitute Your New VO for the Parent VO
Now we need to perform the VO substitution For this we will right click on Extend project and open project properties-->Business Components-->Substitutions.
Select the QueryVO in Available and ExtQueryVO in Substitute list and click on Add button and then press Ok button.

FTP VO.xml and class files to $JAVA_TOP appropriate folder and Run jpximporter
java oracle.jrad.tools.xml.importer.JPXImporter $JDEV_USER_HOME/myprojects/Extend.jpx -username apps -password apps -dbconnection "(DESCRIPTION=(ADDRESS=(PROTOCOL=tcp)(HOST=***)(PORT=****))(CONNECT_DATA=(SID=***)))"
Personalize the page to create new items:-
On QueryPG and click on personalize page complete view and click on Create Item on Table: Employee Table

Set the item style as messageStyledText. Give the id, prompt , View Instance and View Attribute.

Click on Apply -> return to application. You can notice that the page has new two columns.


No comments:
Post a Comment